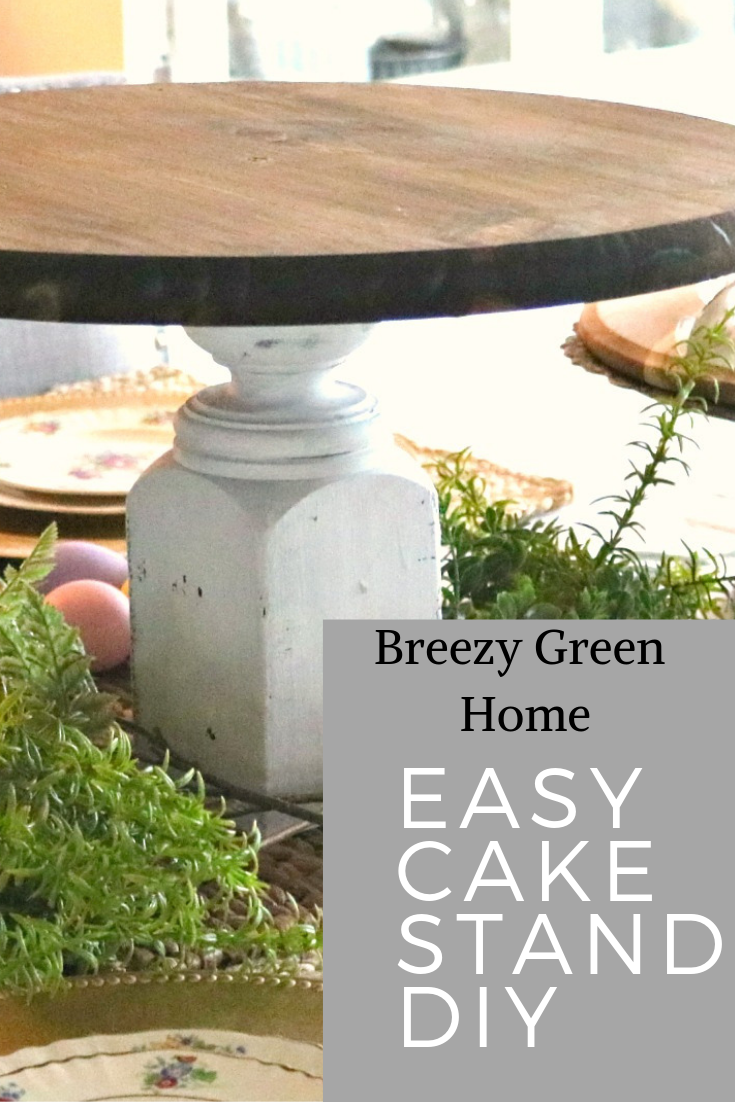
Easy Wooden Cake Stand DIY
Create this easy wooden cake stand. You can repurpose old items and add them with new, or buy all new as all of the items are available at your local hardware store.
Materials:
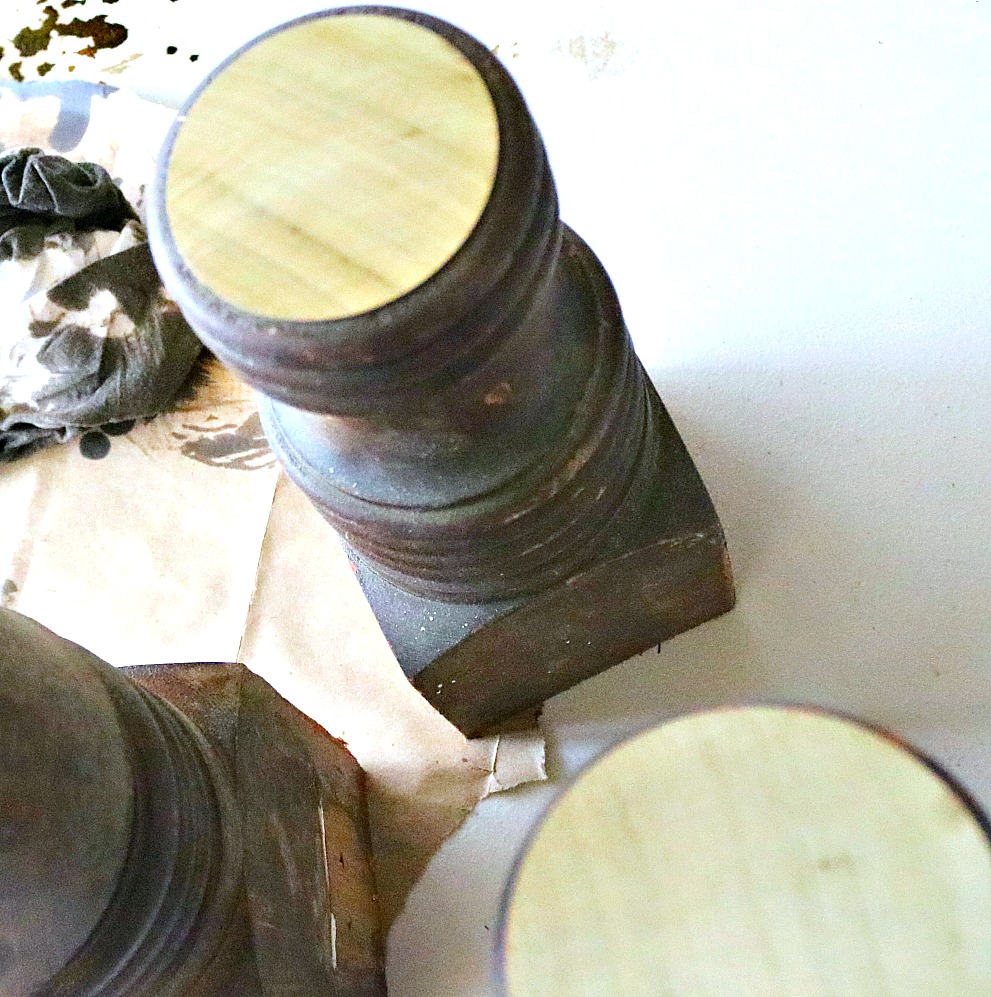
I made this easy wooden cake stand from a salvaged banister that I found at a local vintage shop. But, don’t let that discourage you from making this wooden cake stand. You can find the same materials that I used at your local Home Depot or Lowe’s (not a sponsored post). I made three in total. I’m using one for my dining room table as pictured above.
Gather:
Begin by gathering the materials that you will need to create this awesome piece that you will be using in no time!
- wooden circle (pick a size that will match the base and match your need-Mine is 18″ across)
- Recycled banister, or banister available at your local hardware store
- white chalk paint
- Dark Oak stain by Minwax
- brush
- cloth
- protective gloves
- White chalk paint (you can use acrylic too)
- wood glue
- wax for wood (optional)
Let’s Make This Easy Cake Stand
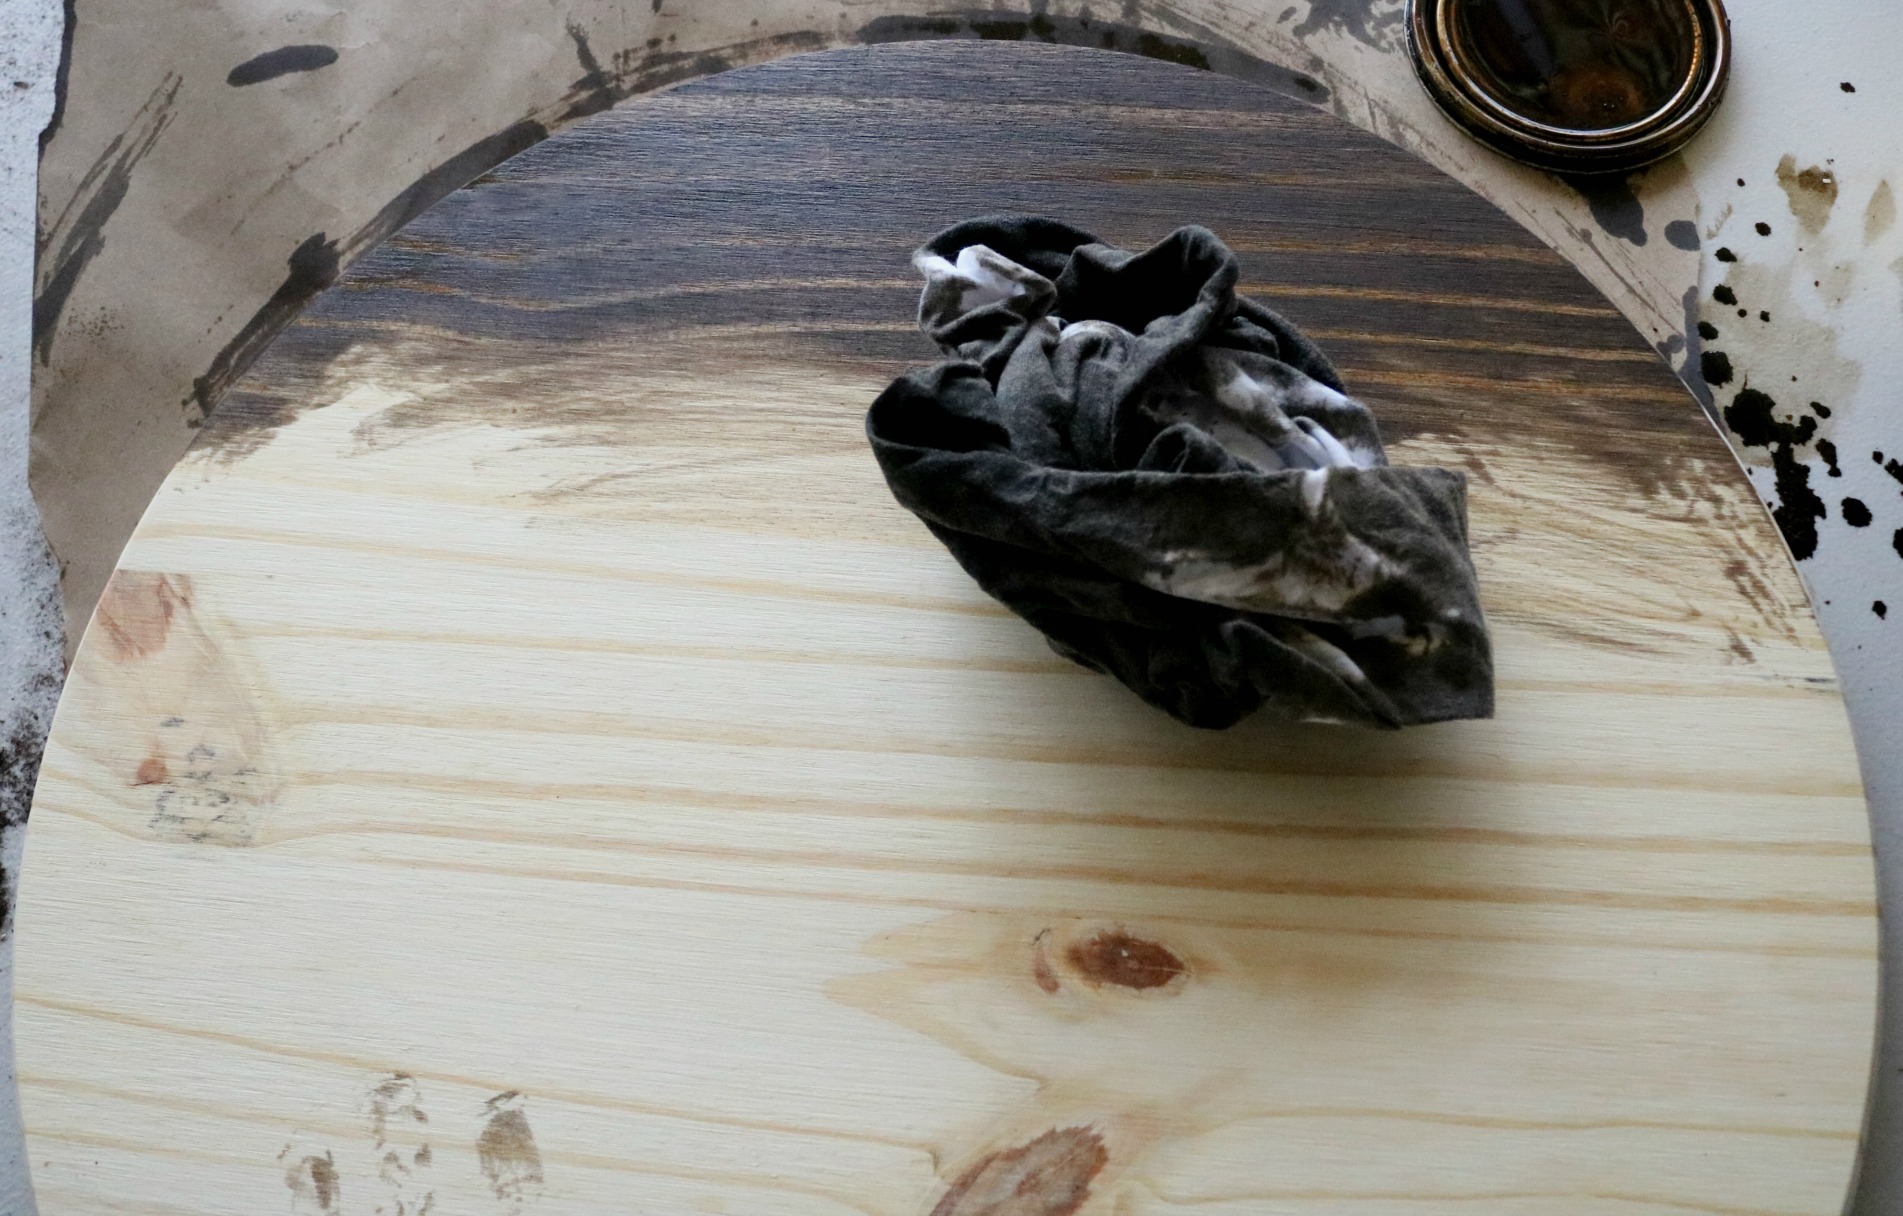
I cut the 40″ banister into thirds with a chop saw. Then, I painted each banister piece with white chalk paint. I used the dry brush method where I was very light on the paint and I did not sand the wood prior. I wanted it to look old and chipped.
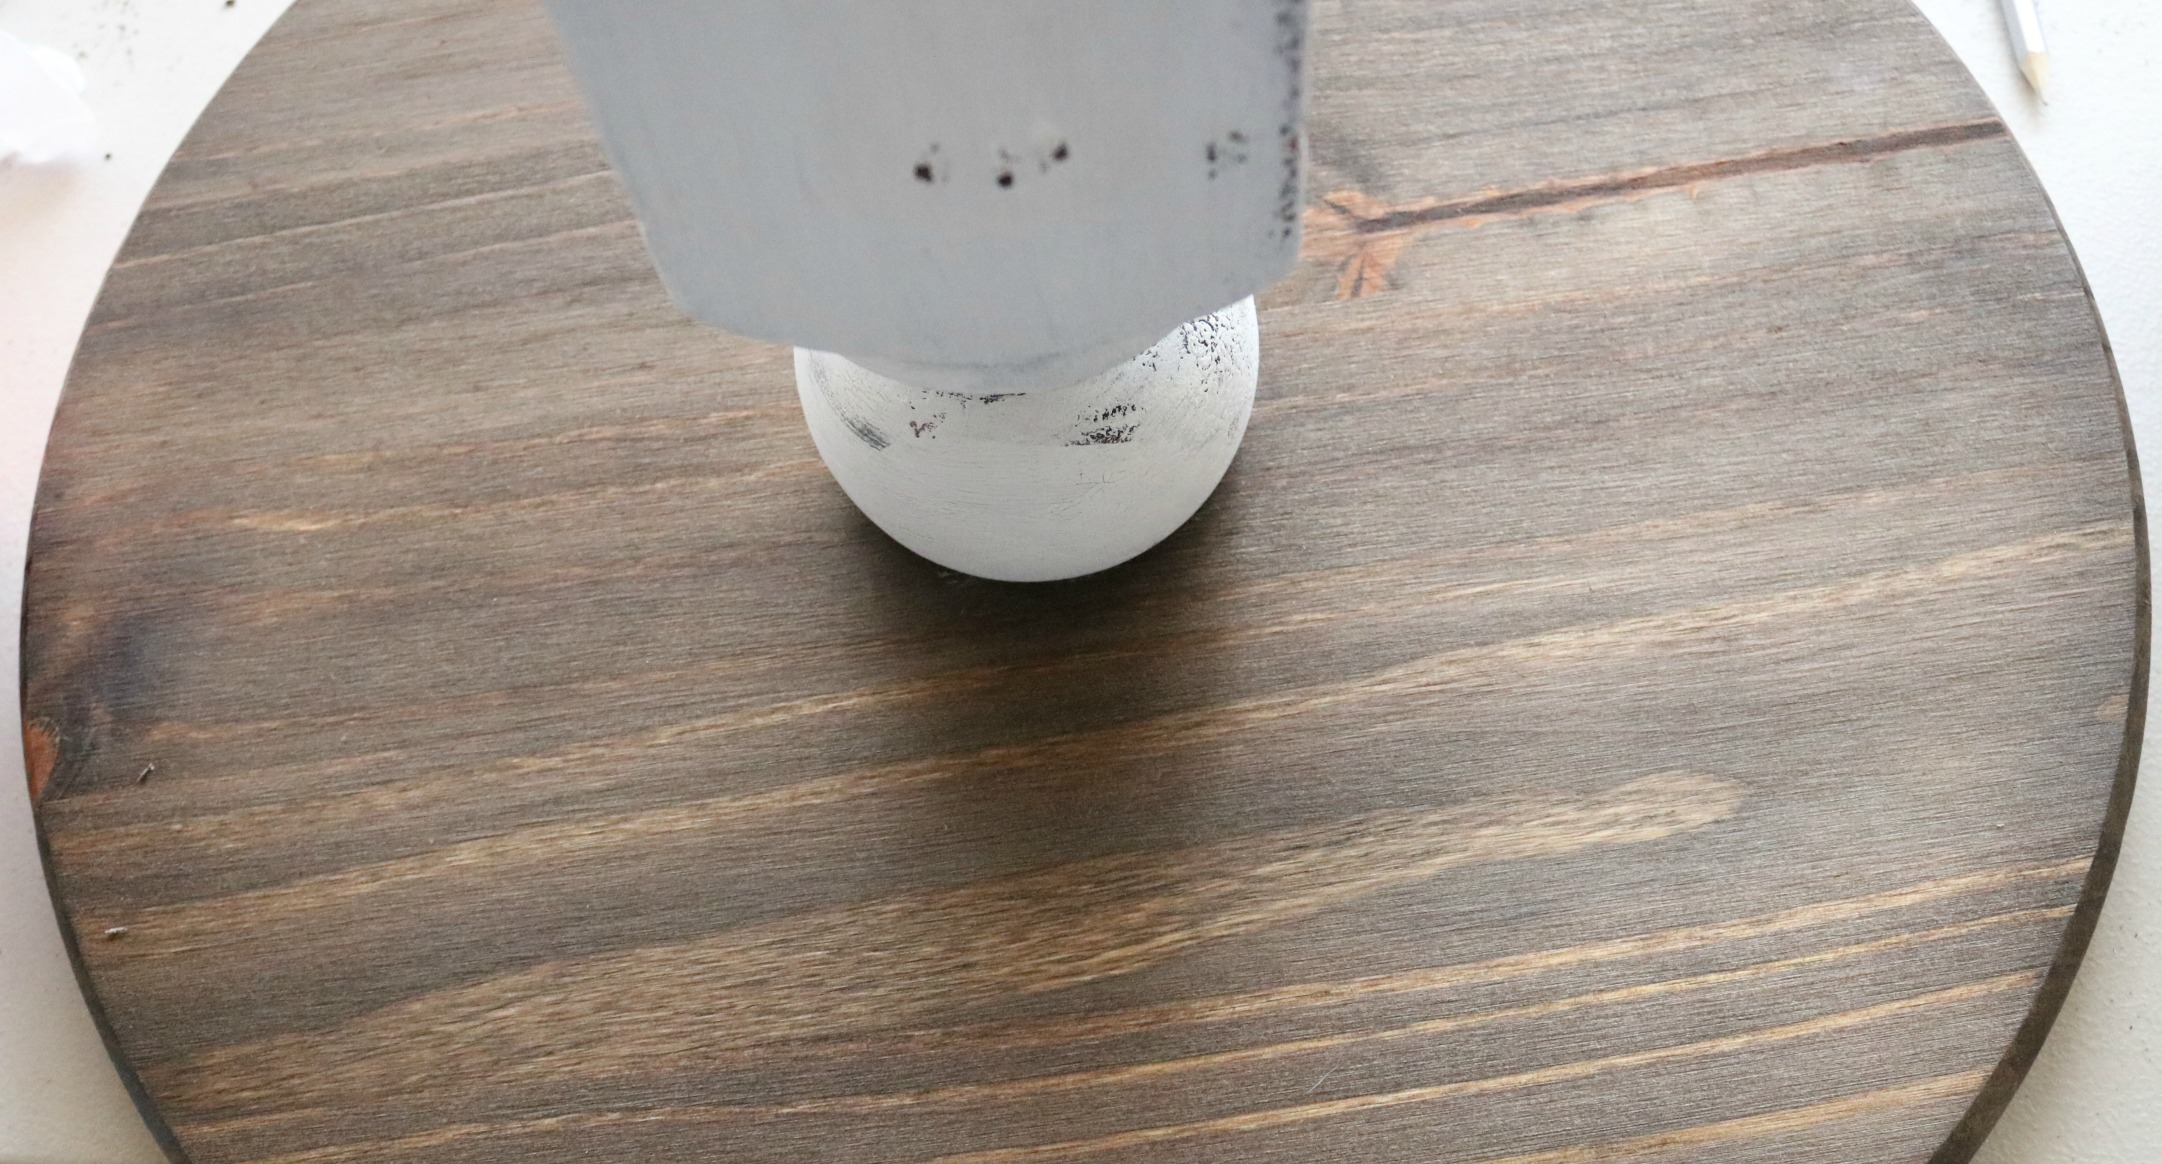
While the banisters were drying, I took the pine wood circle and stained it with Minnwax Dark Walnut stain. After letting the pieces completely dry, I measured and attached the wooden piece to the stand with wood glue. I also added a screw to make sure it was secure. Knowing that I’d always have a plate to display my food, I did not bother to wax it, but of course this step is optional.
I love to display food on simple white plates and I also have a Mariposa tray that I love!
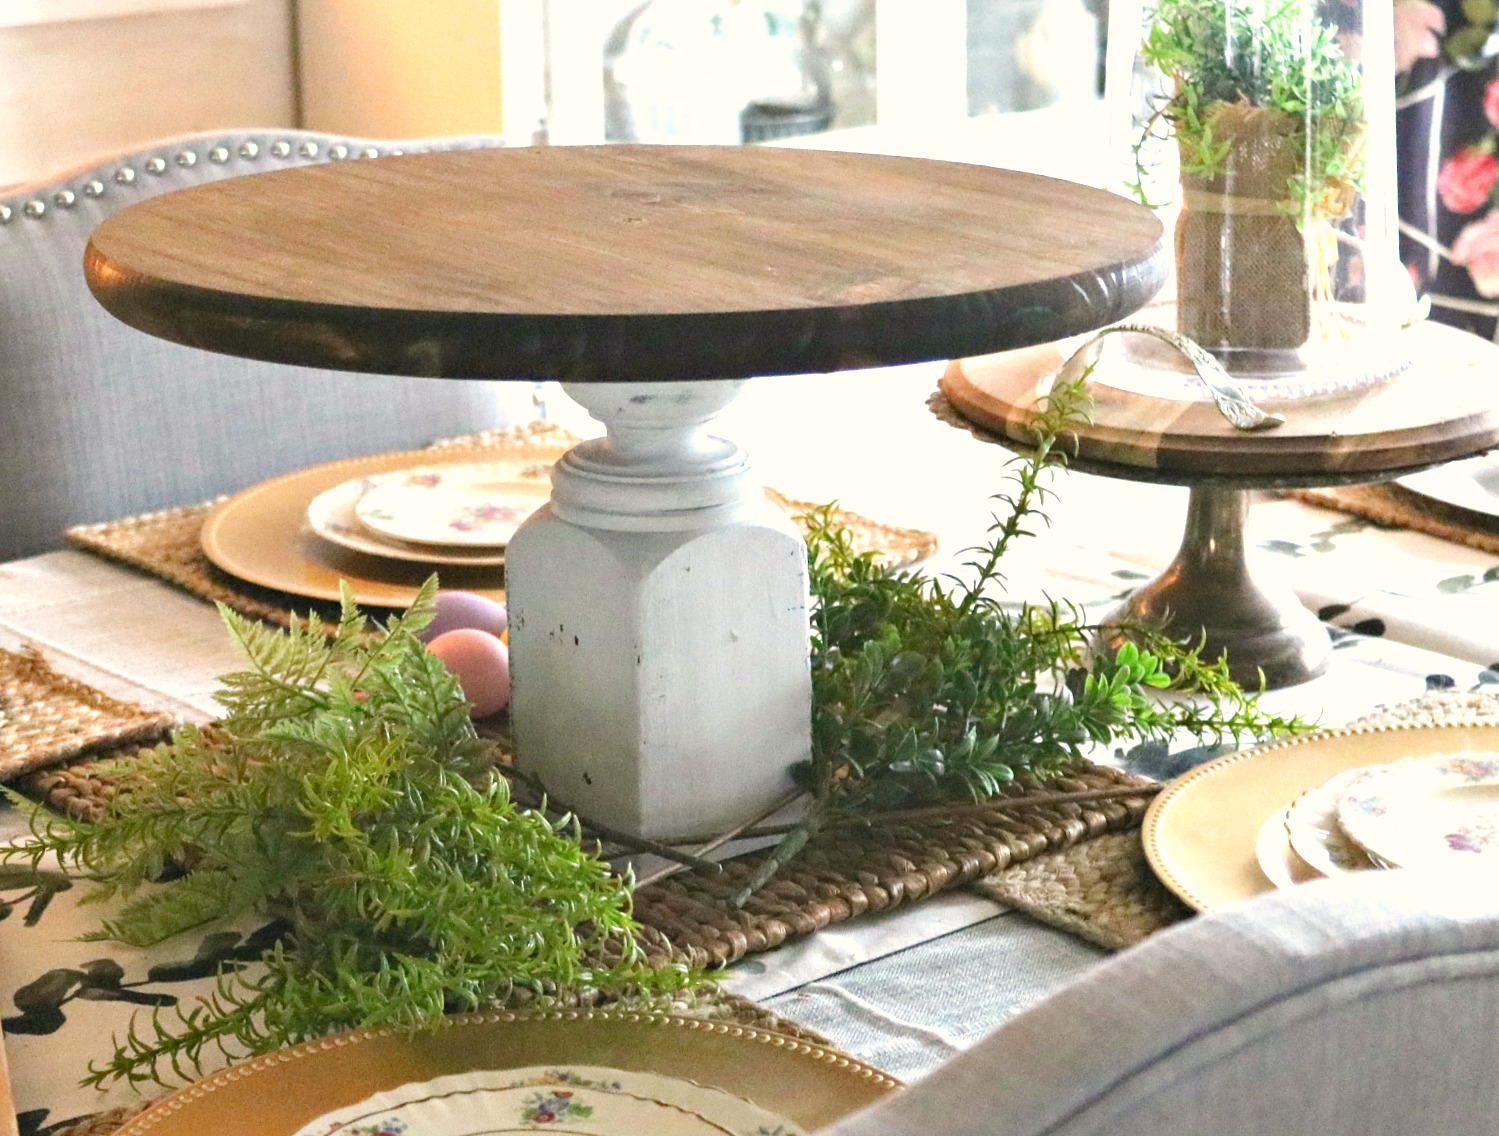
I hope you enjoy making this tray! Happy celebrating and displaying!
XO,
Alyssa